Comparing Claude 3.5 Sonnet and GPT 4o for AI Assisted Development with GitHub CoPilot
Claude 3.5 Sonnet Preview surpasses GPT 4o at a simple task! Explore the process of writing an image resizer in Python entirely via Prompt Engineering, Common Sense & GitHub CoPilot.
Introduction
I wanted to build something simple using GitHub CoPilot entirely via prompting, which means that I won’t write or edit a single line of code as we build this project.
The objectives of this article are to;
Demonstrate prompt engineering skills and AI-assisted programming.
Explore Explainable AI (XAI) aspects of the development process.
Show concrete examples of why we cannot completely rely on AI to automate Software Development tasks.
Provide reasoning and examples of why Computer Science & Software Engineering fundamentals are irreplaceable even with AI-assisted development.
Create a research framework for our students to evaluate LLMs in a simple way.
Feel free to do each step yourself. I recommend trying out the prompts and performing each task as you read this article. I’ve tried to be as descriptive, and detailed as possible so that you can follow along and learn.
If you wish to consume this article as a passive reader, I have attached the generated code, prompts, program outputs, and CoPilot outputs so that you can understand everything without actually doing the activity.
Process
Step 1: Crafting the prompt
We’ll first start by writing a “good enough” prompt for GitHub CoPilot and test the output with both Open AI GPT-4o and Anthropic Claude 3.7 Sonnet.
The prompt is simple, effective and explains all the requirements clearly.
We’re using CoPilot Edits.
Write a script.
Accept image path via --file -f which accepts jpeg and png images.
Accepts file size to resize to as -s --size.
Verbose flag -v or --verbose.
Add a function called resize_image(file_path, new_size) which gets called to resize the image and return the file as the output file. If the file name is not provided, default to {file_name}_output.{extension}, alternatively accept the output file as -o or --output.
INSTRUCTIONS:
Write clean, reusable, modular and performant code.
Make sure proper logging and pretty logging with rich is added so that it looks aesthetic.
Add a banner to print the project name and author at the start.
Use any design patterns if applicable to improve the code quality.
We’ll first test the output with GPT-4o till we have a completely functioning program, and then compare the outputs with Claude. Let’s see how many iterations we need with each model and the key differences in their output.
Step 2: Fixing the initial AI generated code
As you can see, CoPilot assumed that the resizing requirement is according to the dimensions and not file size, despite specifying in the prompt. Let’s ask CoPilot why it did this and understand it’s behaviour better. This helps us build our Explainable AI muscles. It’s also a part of Mindful Prompting, a skill I learnt at my Unified Mindfulness support group where AI is actively explored.
Let’s ask CoPilot the following question:
Why did you generate code that resizes with height and width and not file size in KB?
This is what CoPilot responded with.
This is the updated code. As you can see, the program now accepts the output file size in KB. This is correct. Now, let’s run the program to see if it works properly.
Turns out that our script doesn’t accept relative paths. Another assumption that AI made is that it’s expecting absolute paths, we need to ask CoPilot why it did this. It could also be that Image.open() expects absolute paths. I’m not sure right now, and I’m too lazy to check the documentation. So let’s roll with what we currently know.
We’ll be using #terminalSelection to select the terminal text, and ask CoPilot why it assumed that the script should accept relative paths and not absolute paths. Let’s also tell it that we’re unsure whether opening the image accepts relative or absolute paths, and let’s see what it tells us.
It’s important to read and review AI-generated code. AI doesn’t always produce factual, correct or coherent responses, and it’s our duty as humans to verify all AI outputs before using them in our work or life.
Okay, so let’s craft our next prompt.
As you can see in the output #terminalSelection , the script is not accepting relative paths. Does the program expect absolute or relative paths? Make the necessary changes to ensure relative paths and absolute paths work.
This is what CoPilot responded. As you can see, it didn’t answer our question, but made the necessary changes to the code. If we want an answer here, CoPilot Chat is better suited for discovering or understanding your code better. If you’re curious, and following along, ask CoPilot Chat and comment what it says. I’ll skip that part for now, and continue with getting our program to work.
This is the edited code.
As you can see, it’s using os.path.abspath to get the absolute path of the file and then passes it to Image.open.
However, running this still gives us an error. As you can see, the logs also are not very conclusive, we don’t know which line exactly is the code failing at because there’s no stack trace. Again, I find it pretty rookie that AI didn’t know that it should add a stack trace logging for errors, especially after writing a generic error handler. This is exactly why good software engineering fundamentals still cannot be outsourced to AI.
We have two options here:
Add logging to examine which line the code is failing at.
Show CoPilot the error and ask it to provide a fix.
Let’s go with option 2. It’s simpler and relatively low-effort (for this situation).
Again, let’s craft our prompt.
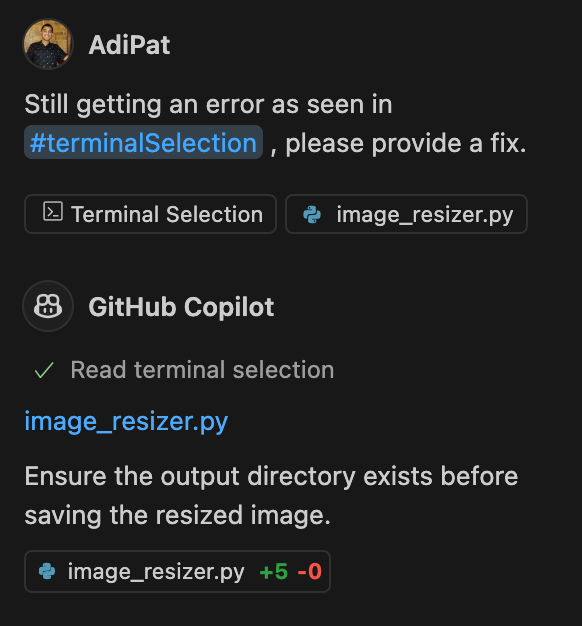
Still getting an error as seen in #terminalSelection , please provide a fix.
Ah, interesting, the output directory was missing. I wonder if we’d be able to catch this error if that wasn’t the case. Point to note; AI often misses edge cases, and you as a Programmer need to be vigilant enough to tell it to solve for the necessary edge cases so that your software is, at the bare minimum, maximally functional.
As you can see in the code, it added a check to create the output directory.
Let’s run it. At this point, I’m too lazy to read the code, and for a wide variety of reasons, I’d like to get this program fully functional entirely with prompting — it’s also a great Prompt Engineering exercise.
Prompt writing time!
Still getting an error as seen in #terminalSelection , please provide a fix.
This kind of prompting is very naive, but that’s how most people prompt on a day to day basis. As we all know, quite a lot of us humans are really lazy and like to get more done by saying less (atleast with AI).
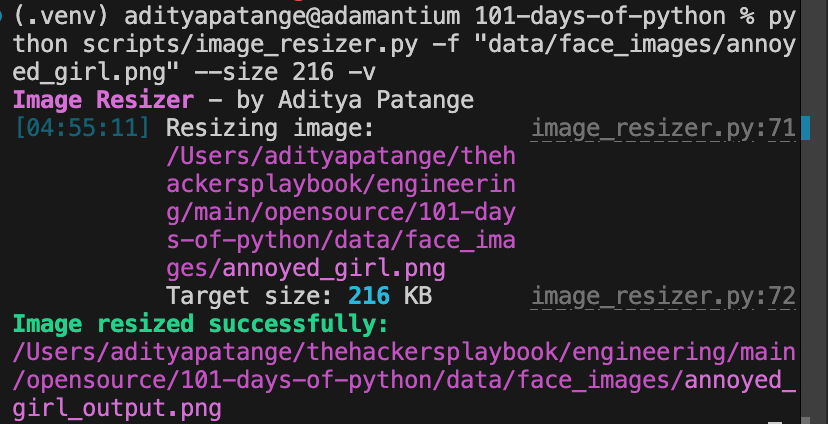
As you can see, it now creates the output file and then writes to it.
Aha, it worked!
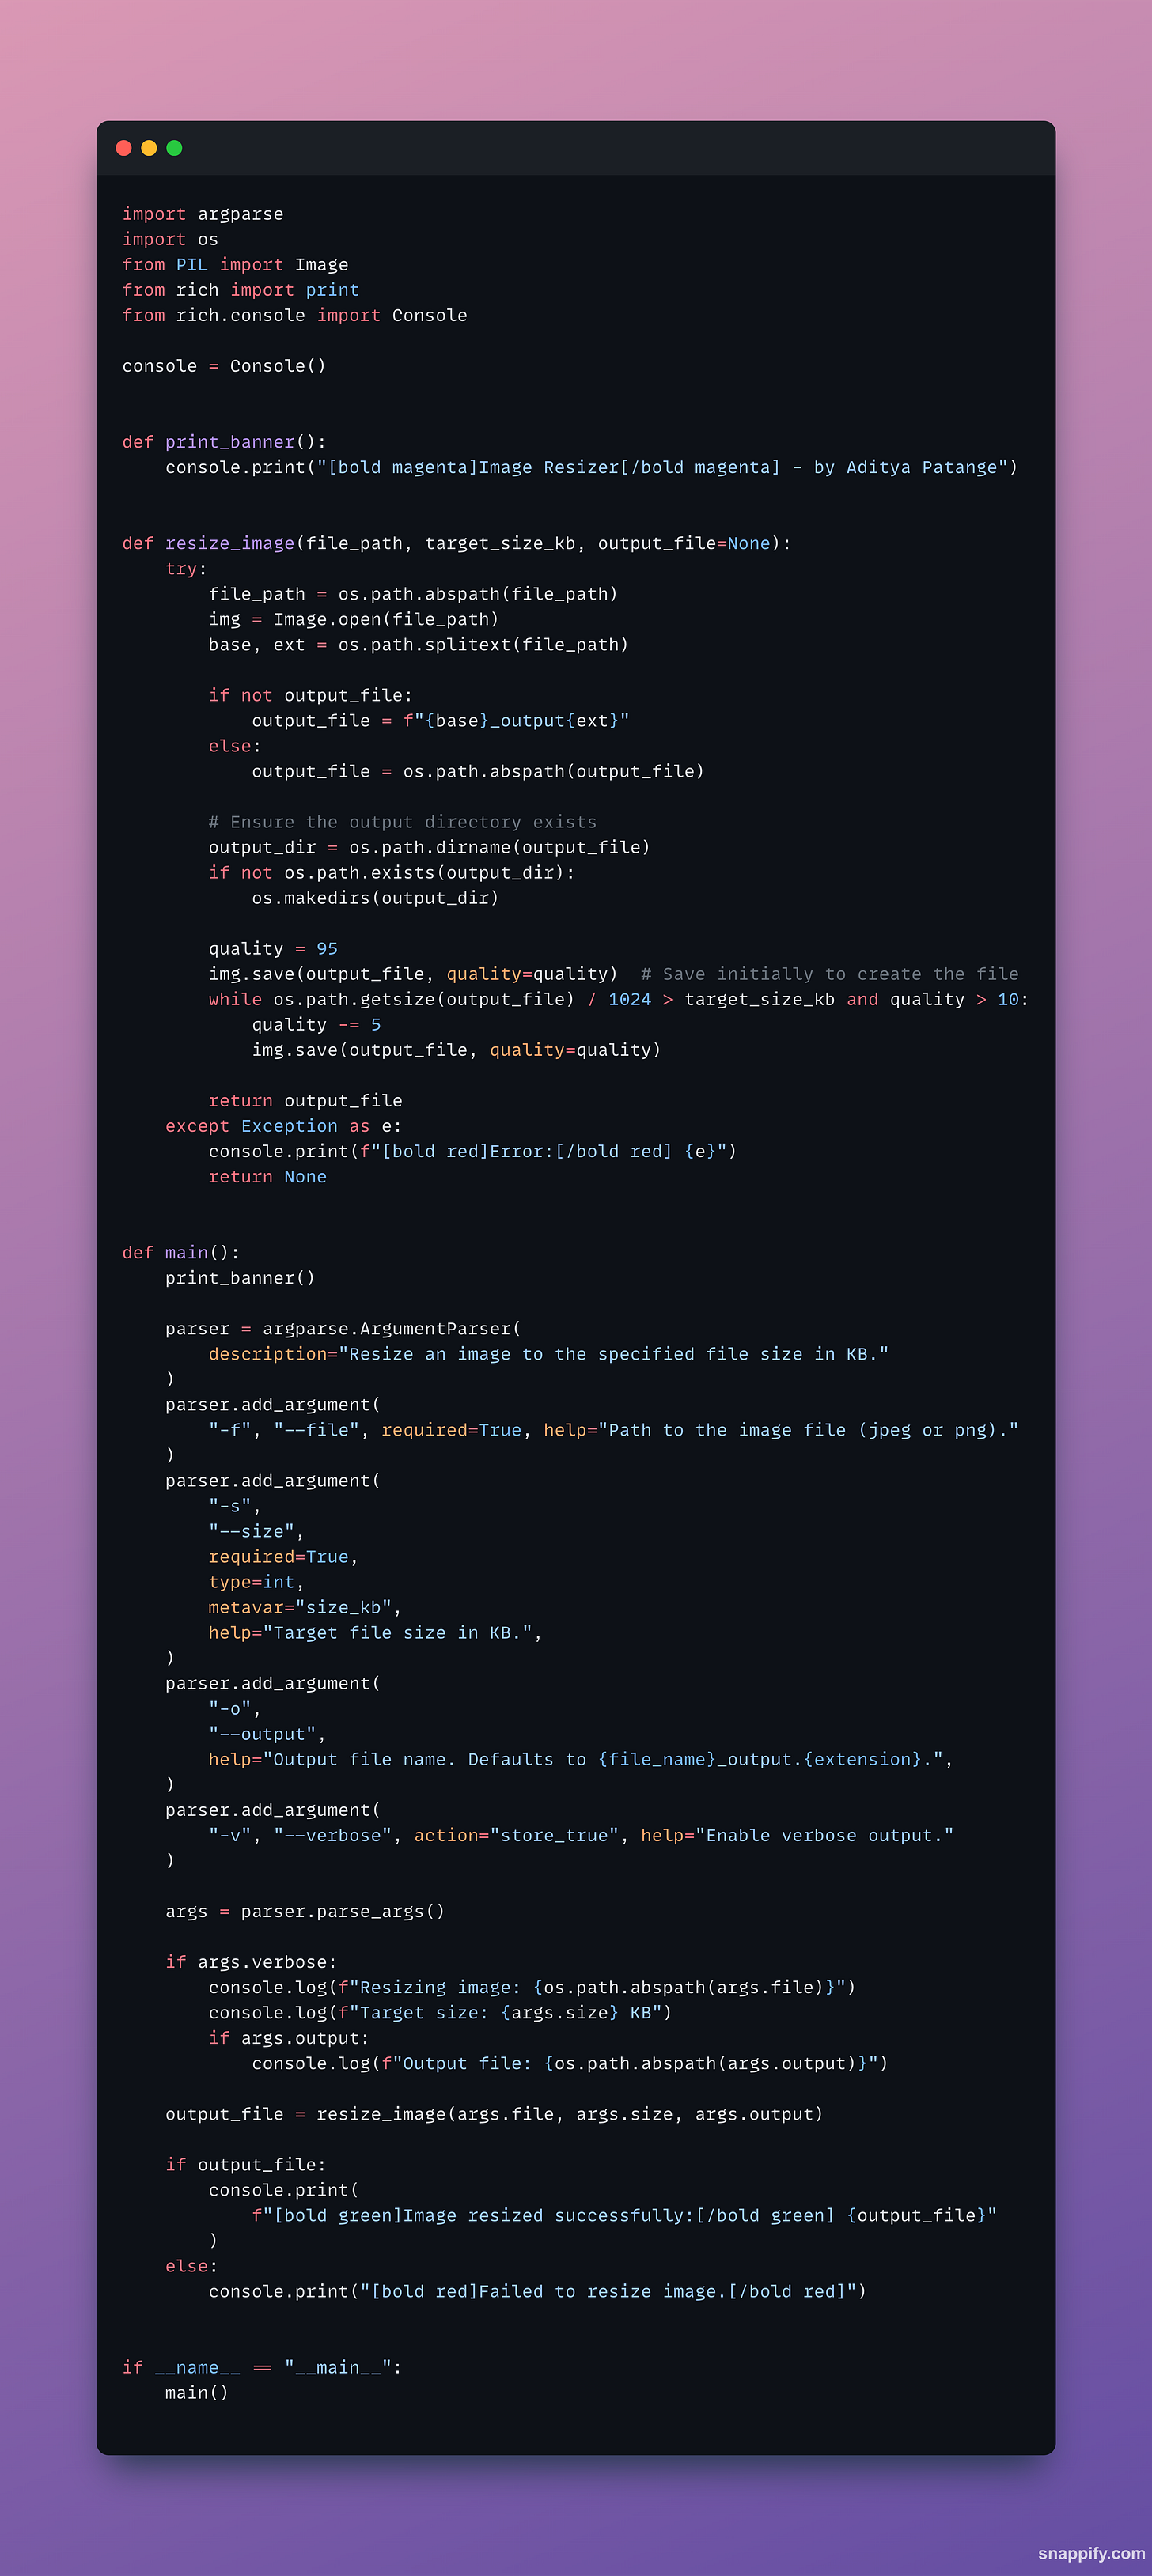
Let’s take a look at the working code.
Right now, our definition of ‘working’ is code that executes without errors.
Step 3: Validating the Program Output
In this step, we’ll check if our program is working correctly i.e. it’s producing correct output or not.
As you can see, I didn’t know the original file size of the image was 202KB and I supplied a target file size of 216KB. Instead of resizing the image to a larger size, I’m not sure what it did which led to an output file size of 172KB. This needs to be investigated further. Let’s try with a smaller target file size now and see if it works.
Let’s try a file size of 50KB.
Obviously, this isn’t working correctly.
Let’s take an interesting journey through the experiment now, and switch our model to Claude 3.5 Sonnet Preview.
We have 3 choices at this point:
Debug the code further with GPT 4o.
Switch to Claude 3.5 Sonnet and debug the code from here.
Trash all the code and attempt the problem from scratch with Claude.
Given that we know Claude is better at coding tasks, and we want to compare OpenAI vs Anthropic for this task, let’s go with Option 3 — we’ll trash all the code and use the same starting prompt.
Step 4: Switching Model to Claude 3.5 Sonnet
Let’s use the same starting prompt.
Write a script.
Accept image path via --file -f which accepts jpeg and png images.
Accepts file size to resize to as -s --size.
Verbose flag -v or --verbose.
Add a function called resize_image(file_path, new_size) which gets called to resize the image and return the file as the output file. If the file name is not provided, default to {file_name}_output.{extension}, alternatively accept the output file as -o or --output.
INSTRUCTIONS:
Write clean, reusable, modular and performant code.
Make sure proper logging and pretty logging with rich is added so that it looks aesthetic.
Add a banner to print the project name and author at the start.
Use any design patterns if applicable to improve the code quality.
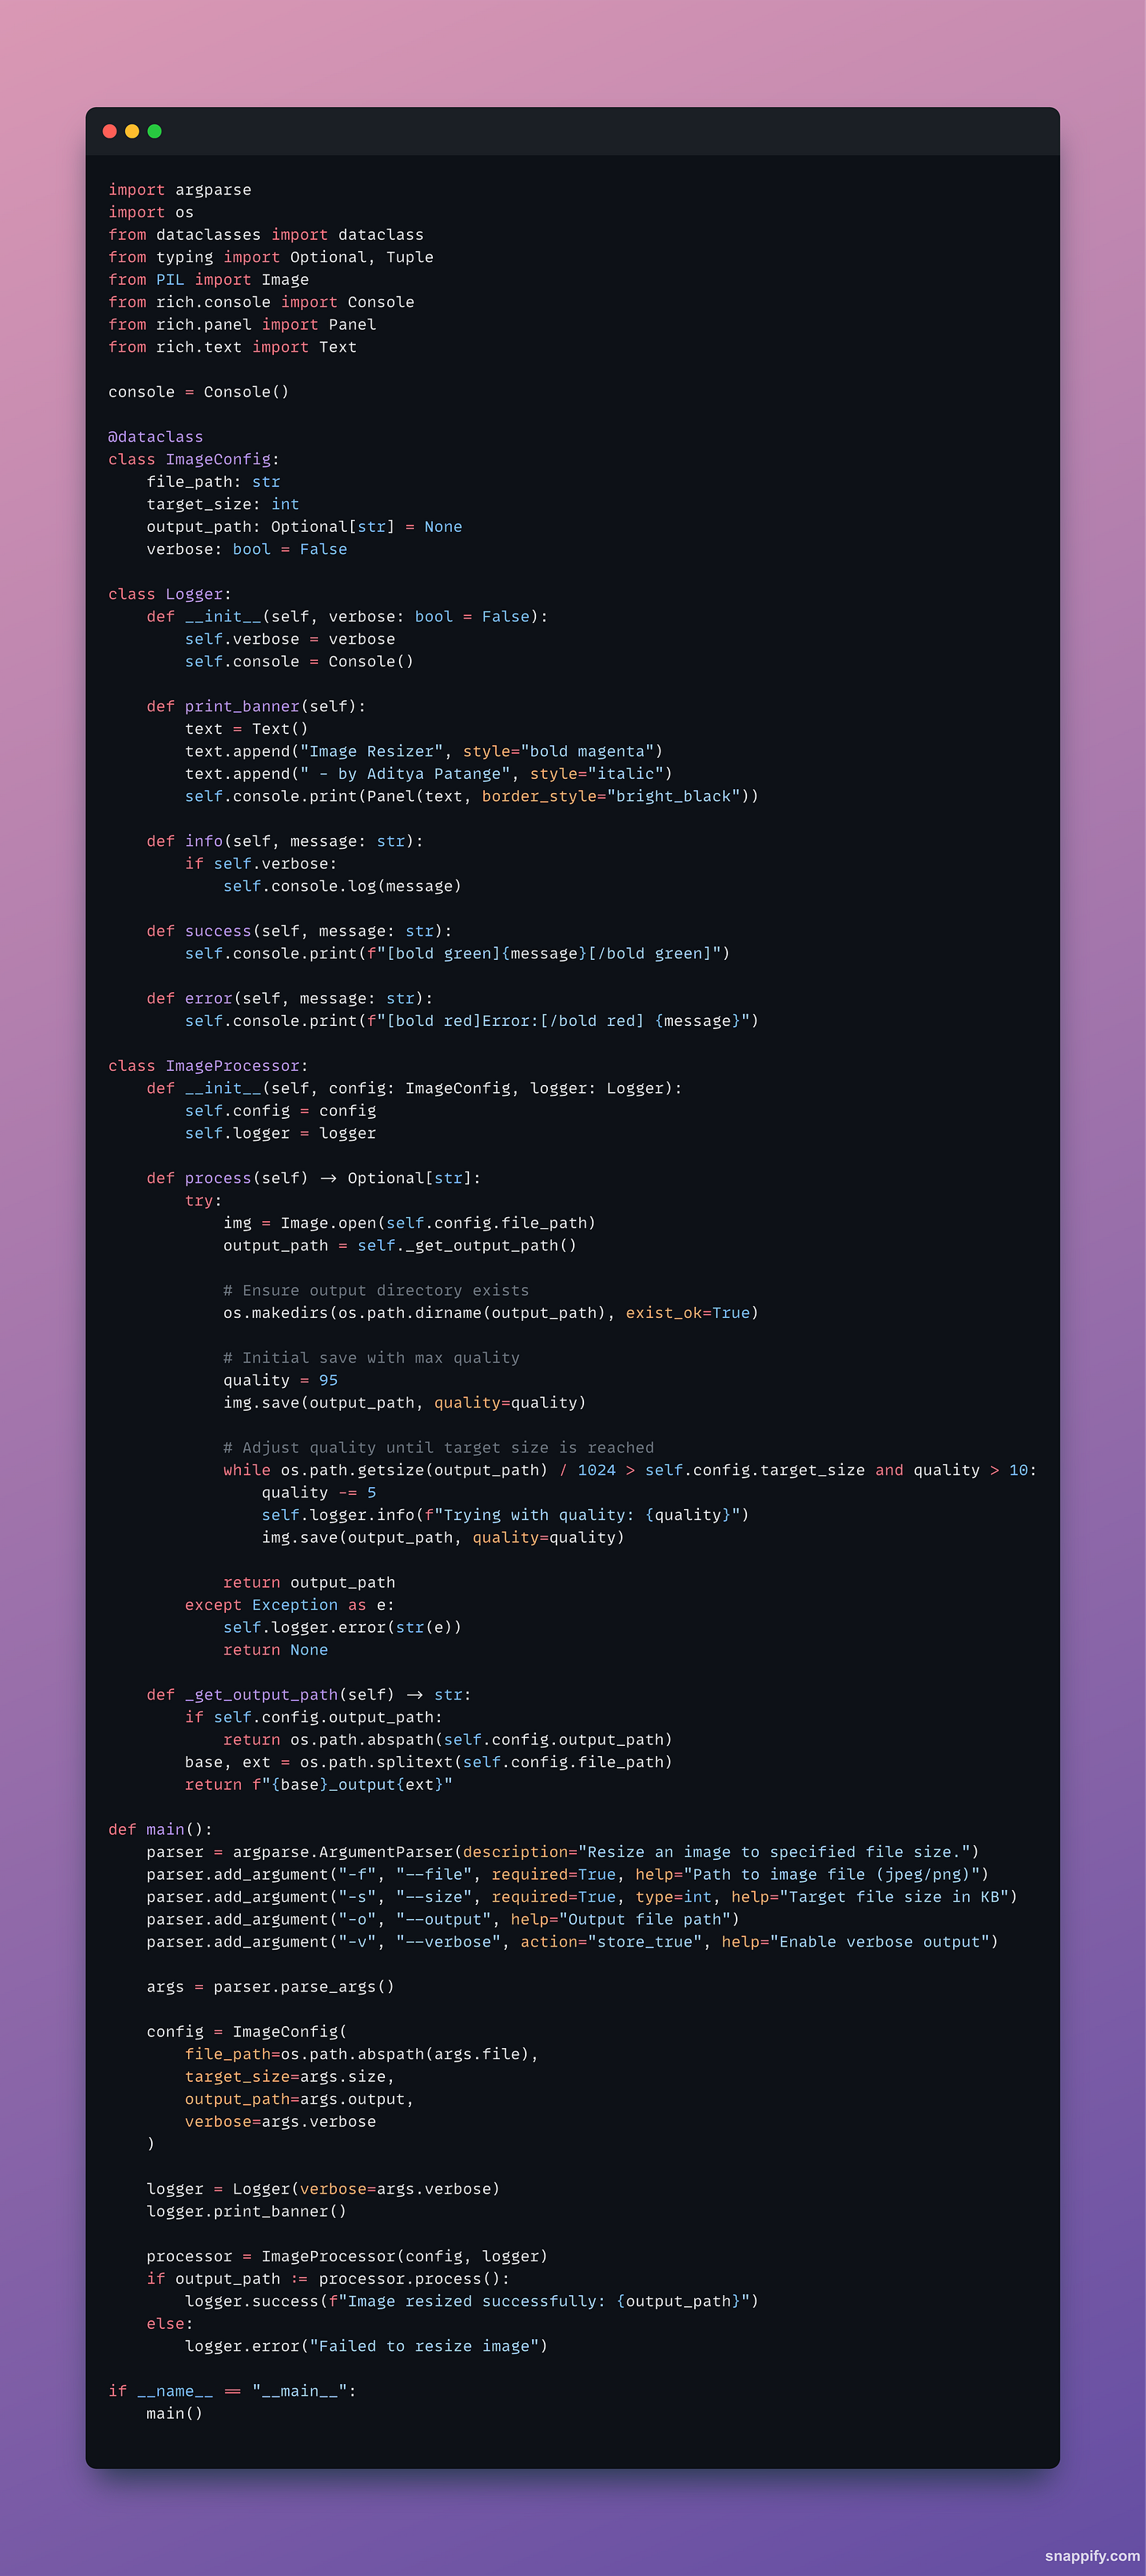
Claude gave a much more nuanced response and seems like it actually followed our instructions based on the Editor chat output.
As you can see, the code is well abstracted, clean and looks closer to production quality, atleast at first glance.
Now, for the Litmus Test. Let’s see if the code works.
Now I’m beginning to wonder if my Mac OS is reporting an incorrect value. So let me use the command-line to check the file size.
Okay, Mac OS is correct.
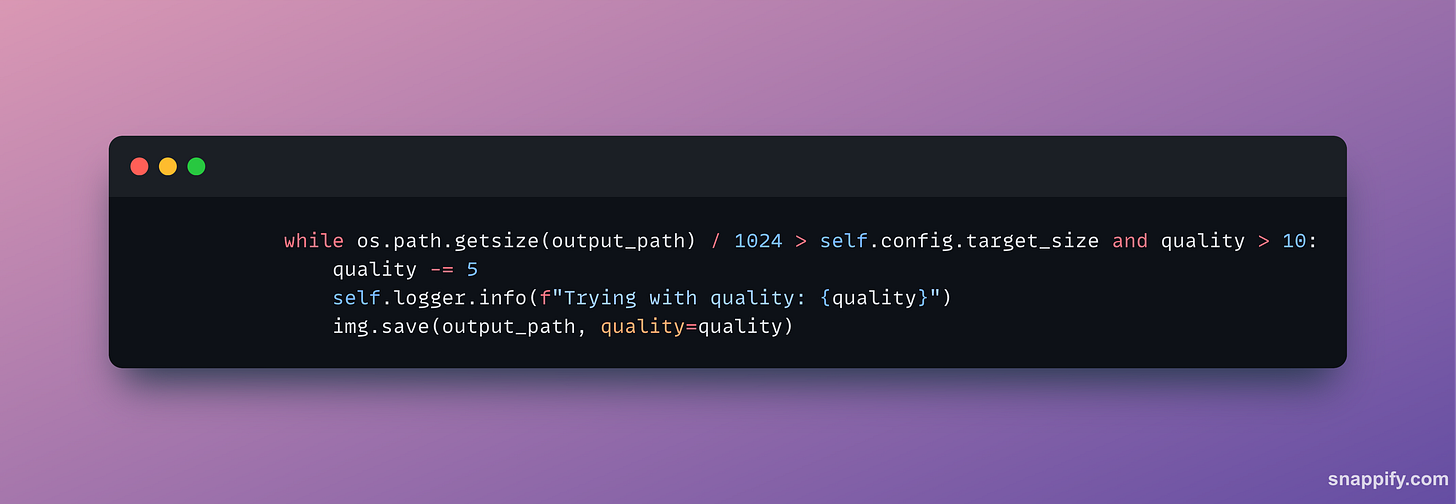
It seems like the problem is with this portion of the code.
Step 5: Fixing Correctness
Now let’s iterate till we can make the program correct for our use-case.
Let’s show Claude the terminal selection and tell it that the current approach isn’t working.
As you can see in the #terminalSelection , even after resizing, the file size is unchanged.
Okay, looks impressive, let’s accept the edits without checking and test the output again.
Okay, it worked.
Doesn’t work with file sizes larger than original size.
This is the code that we executed.
As you can see, the code includes the corrections to properly resize. The logic now computes the width and height, resizes and then saves the output image. It keeps reducing the dimensions by 30% on each iteration. This explains why it wasn’t working for file sizes larger than the original file size, the loop doesn’t run because current_size < target_size.
Let’s ask Claude to support files sizes larger than the current size.
As you can see in #terminalSelection , when the file size is larger than original file size, it doesn't correctly resize.
Me, without even reading the code — “wow, great, let’s accept the edits”. Ideally I should read and understand what it did, but we’re just going to test and see if it works or not, because automation. If you didn’t understand my sarcasm by now, you should reflect on your life choices. Okay my poor humour aside, it actually cannot upscale, it simply returns the original image back again, we’ll not accept edits and go through another round of edits with a new prompt.
We want it to upscale, so let’s tell Claude to do that.
I want the image to upscale if the target size is greater than the current size.
Looks good? Let’s test.
Okay, it upscaled, but it somehow hit a limit and couldn’t upscale beyond that. Probably because the aspect ratio couldn’t be maintained. However, it did upscale to the max possible capacity (looks like).
This code works and our program, at this point, is completed.
Step 6: Iterating with GPT 4o
Now that we know what’s needed in the program, let’s take our old OpenAI code and try to get the GPT 4o version correct in a single, detailed, and complete prompt.
Again, let’s start with the prompt. Now that we know certain things about the problem, let’s use that information.
Update the code to:
Dynamically compute the height and width, check the size, and resize till the target file size is met.
If the target size is greater than current size, then upscale the image repeatedly.
Add necessary loop termination checks so that infinite loop doesn't occur.
Add logging wherever necessary and ensure that its within the verbose flag.
This is what CoPilot said.
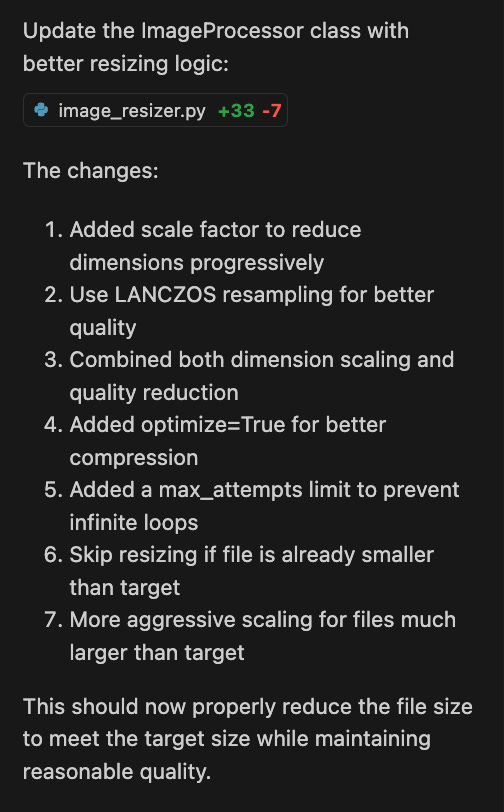
As you can see, it does nothing fancy, it just restructures your prompt and then probably passes it to LLM in a direct fashion. Claude actually determined the context, understood the instructions, and created a plan of action before writing the code.
This is the code, if you compare it with the Claude variant, the GPT 4o version simply uses a constant scale factor to compute the dimensions and then resizes it, repeatedly. Claude, on the other hand, dynamically computed the scale ratio using a formula that uses the current size, target size, and a constant, whereas GPT 4o simply uses a constant scale factor. At this point, I’m not sure if that’s the reason why it’s not working because I didn’t spend much time going through the code (because if you work for a startup, you will realise how less of time you have in comparison to the things that need to be done, so it’s natural to not have time to review every iteration).
As you can see, it fails for smaller target sizes.
And it errors out for larger target sizes. I don’t even care to know or understand what this error means. Again, if I I have my ‘research hat’ on, I wouldn’t have this attitude, I’d read through the error, understand and fix it. Remember, we’re doing this exercise to simulate a real ‘startup development task situation’, as a tertiary objective which I have not mentioned in the Introduction.
Homework: Come up with 5 secondary and tertiary objectives, along with explanations — you need to create an innovative Jupyter Notebook to ‘teach’ the idea of OKR (Objective Key Result) with the input being this article and it’s given objectives. Submit the notebook at 101 Days Of Python as a PR — if we like your solution, we’ll invite you for an interview with our team for a paid Prototyping Engineer Full-time Employment or Contractual Opportunity. We work with some interesting and impactful clients, so we’re always on the lookout for great talent!
To save time, and to maintain a readable length for this article, we’ll not iterate with GPT 4o further, and use Claude for further edits if required.
Step 7: Final Testing & Benchmarks
We’ll do something even more fun!
Let’s use CoPilot to write a simple test and benchmark script for us. As you know, software engineering or hacking is incomplete without benchmarking!
command 1: 101-days-of-python % python scripts/image_resizer.py -f "data/face_images/annoyed_girl.png" --size <TARGET_FILE_SIZE_IN_KB> -v
command 2: stat -f "%z" data/face_images/annoyed_girl_output.png | awk '{print $1/1024 " KB"}'
Write a shell script to run these 2 commands against various file sizes, and provide the results in a neat tabular format along with the runtime stats. Provide atleast 20 results. Also include the original file sizes and supplied target file sizes in the tabular output. Use colouring to make it more aesthetic.
Also include the % error between target file size and actual output file size in the table.
Here’s the generated script, Claude got it right in the first attempt.
I like writing simple, and elegant shell scripts for automation. It’s to me, one of the most fun parts of programming.
These are the results:
Some interesting insights:
The error between generated output file and target file size gets lower when the target file size is somewhere close to the original file size.
The code is quite performant for regular use, yet I think it’s a little slow. 9 seconds for a 600KB file isn’t great. It would be interesting to see how fast Go is, in comparison.
For practical purposes, this is good enough. In most cases, we want to resize an image to support the data guidelines of a particular service, and we’d generally be dealing with thresholds, so if we can get our output file within the threshold, our problem is solved. I’m sure there are niche use-cases where precision is necessary, but for the average case, this should be good.
The error is larger for lower file sizes.
I guess we’re ready to use this script!
Conclusion
I wanted to create a resource for my students to build a mental model or research framework to compare or evaluate AI models for daily tasks. AI-assisted development seemed like a good area to demonstrate how LLM evaluation can be done with simple prompting, observation, and basic data collection.
I personally use GPT 4o for coding a lot more than Claude despite hearing all the claims and seeing factual evidence that it performs better at coding. This pushed me to perform an experiment where I can see Claude’s coding magic in a real-world, day to day task and compare it with GPT 4o. I’m now convinced that I can make the switch to Claude for daily development activities. Lastly, I wanted to provide my readers and students the results from my comparison so that they can use those insights to become better software engineers, hackers, programmers, or product developers.
In fact, even if you are someone who has never written a single line of code, this article will help you learn the art of prompting LLMs well — I’ve not used any sophisticated Prompt Engineering Techniques, just plain English — in this aspect, thanks and grateful to my Meditation Teacher Bhante Gunaratana that I am gradually learning how to simplify my language and communication to help myself and all the people around me.
If want to build your startup 10x faster, ship high quality software, and build a compelling technological moat, contact us [thehackersplaybook0@gmail.com]. Visit our GitHub Profile to view our OSS (Open Source Software) initiatives and contributions. 💡


